Masking is a powerful feature in Figma that allows you to reveal only specific parts of an image, shape, or design by using another layer as a boundary. Whether you’re cropping an image into a custom shape, creating avatars, or designing layouts with visual intrigue, masking helps you control exactly what’s visible—and what’s not. This guide will walk you through how to use masks in Figma step by step.
What Is Masking in Figma?
In Figma, a mask uses one layer (usually a shape) to define the visible area of one or more layers beneath it. The top layer acts as the mask, and anything underneath that doesn’t fall within the mask shape will be hidden.
Step-by-Step: How to Create a Mask in Figma
✅ 1. Place the Masking Shape on Top
Start by drawing or importing the shape you want to use as the mask—this could be a circle, rectangle, star, or custom path. Position this shape above the content (image, text, frame, etc.) that you want to mask.
📌 The mask must always be the topmost layer in the group.
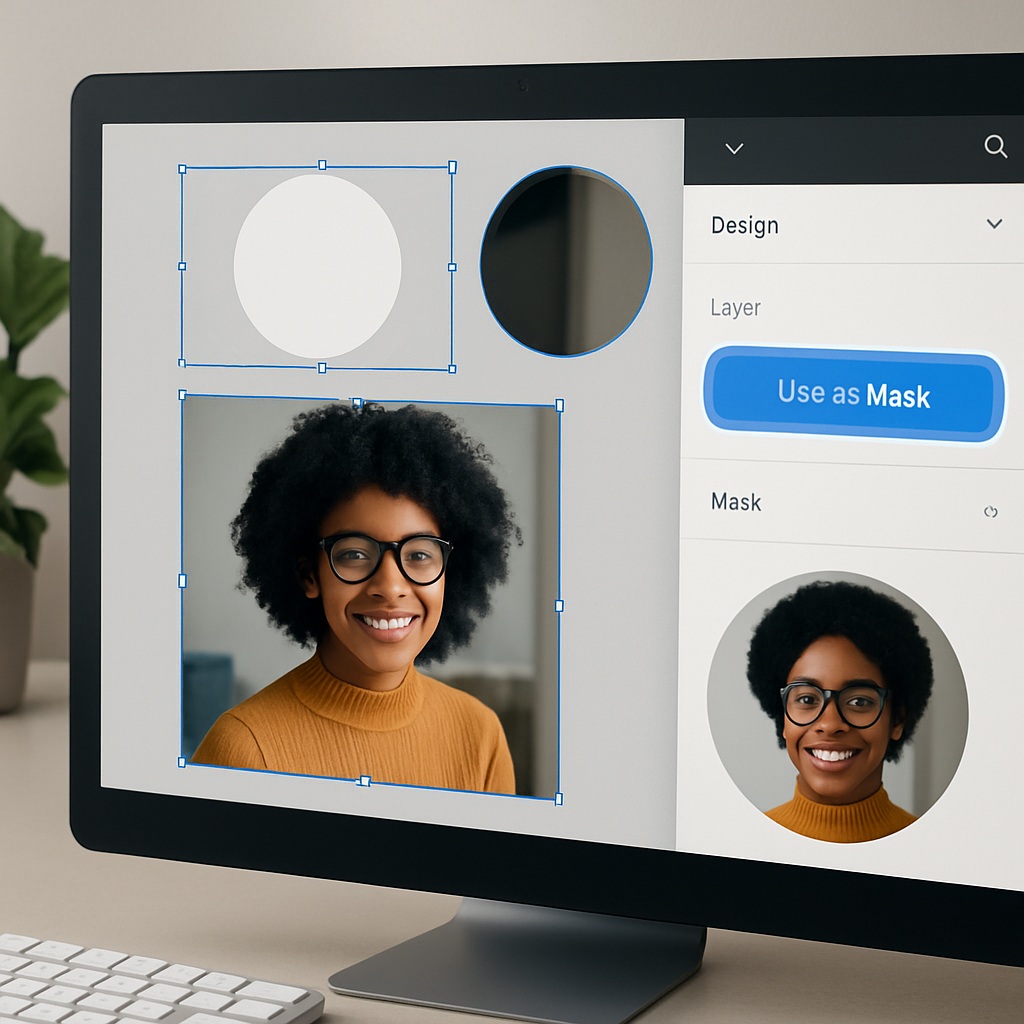
✅ 2. Select Both Layers
Hold Shift and click both the masking shape and the content beneath it. Alternatively, drag to select them all at once.
✅ 3. Apply the Mask
There are two ways to mask:
- Right-click the selection and choose “Use as Mask”
- Or press the shortcut Ctrl/Cmd + Shift + M
Once applied, the visible area of the content will be confined to the shape of the mask.
Example Use Cases
- Circular profile images
Use a circle shape as the mask on top of a photo to create avatar-style thumbnails. - Custom image crops
Mask an image with a polygon or organic shape for a unique visual layout. - Text masking (advanced)
Use outlined text as a mask over images or gradients to create striking word art.
How to Edit a Mask
After you’ve created a mask, Figma will group the layers under a special “mask group.” You can:
- Double-click to edit the masked content
- Move or resize the mask shape to reveal more or less
- Ungroup the mask by right-clicking and selecting “Remove Mask”
This non-destructive approach lets you tweak your layout at any time.
Tips for Better Masking
- Masks can be combined with Auto Layout or components for reusable layouts.
- You can nest masks for more complex visual effects.
- Use masks on top of frames, images, or gradients to limit their visual boundaries.
- To apply multiple masks across a layout, consider grouping them logically to stay organized.
Final Thoughts
Masking in Figma is a simple yet incredibly useful technique for controlling what parts of your design are visible. By learning to apply masks properly, you can create polished visuals, dynamic layouts, and image treatments that go beyond basic cropping. Whether you’re prototyping a product card, designing a profile page, or experimenting with creative typography, masks give you design superpowers.

