When working with vector shapes in Figma, each shape is made up of individual points (also called nodes or anchor points) that define its path. Sometimes, you may need to remove one or more of these points to simplify your design or reshape an object. Figma makes this process intuitive through its vector editing mode.
Step 1: Select the Vector Shape
Start by selecting the shape or line that contains the point you want to delete. You can click on the object directly on the canvas or find it in the Layers panel.
Tip: Make sure the object is a vector shape. If it’s not, you can convert it by right-clicking and choosing “Outline Stroke” or using the “Convert to Vector” option.
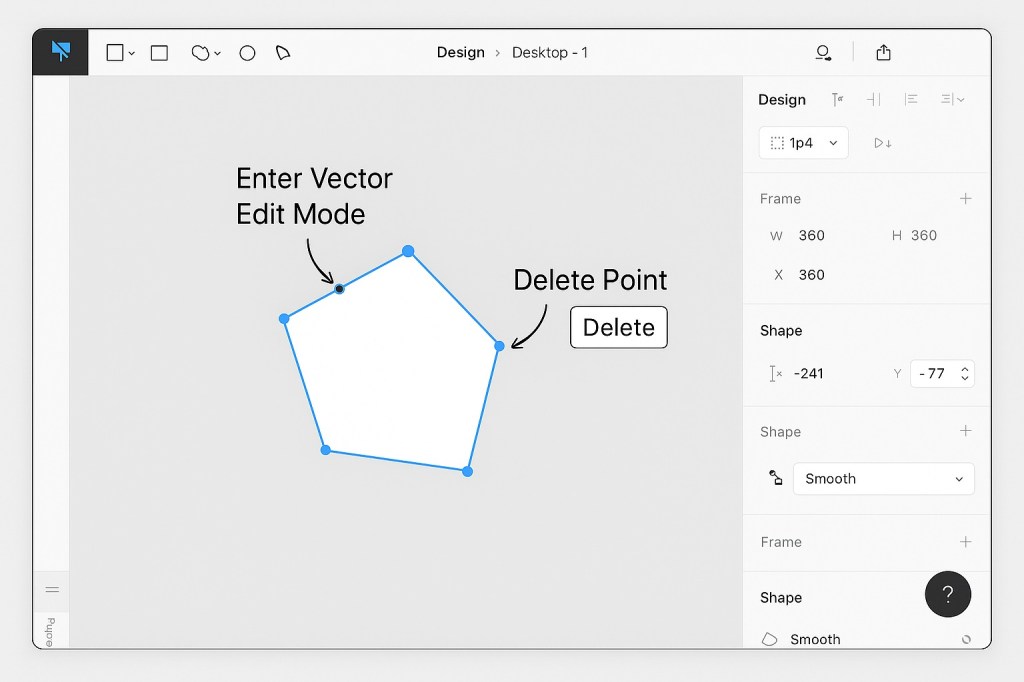
Step 2: Enter Vector Edit Mode
To edit individual points:
- Double-click the shape on the canvas, or
- Select the shape and press Enter on your keyboard
This switches Figma into Vector Edit Mode, where each point on the shape is visible and editable.
Step 3: Select and Delete the Point
Click on the point (node) you want to delete. You can also hold Shift to select multiple points.
Once selected, press:
- Delete (on Mac or Windows)
- Backspace (alternative on some keyboards)
The point will be removed, and Figma will automatically adjust the remaining path accordingly.
Bonus: Clean Up Unnecessary Points
If you want to simplify a path with many points, you can use the “Simplify” plugin or manually delete unnecessary points using the method above. This helps reduce file size and improve design clarity.
Troubleshooting
- Can’t select a point? Make sure you’re in vector edit mode.
- Shape distorting oddly? Some points are essential for curves. Try adjusting the handles before deleting.
- Multiple shapes in a group? Ungroup them or isolate the shape before editing.
Summary
Deleting points in Figma is a quick way to clean up and fine-tune your vector graphics. Just enter vector edit mode, select the point, and press delete. With a little practice, you’ll have smooth, clean shapes that enhance your UI or illustration work.

