Accordions are a common UI pattern that allow users to expand or collapse content within sections—helpful for organizing information without overwhelming the screen. While Figma isn’t a full-fledged code-based tool, it offers powerful interactive prototyping features to simulate this behavior visually. In this guide, you’ll learn how to create a fully functioning accordion using Auto Layout, Variants, and Prototyping.
🧱 Step 1: Create the Base Accordion Layout
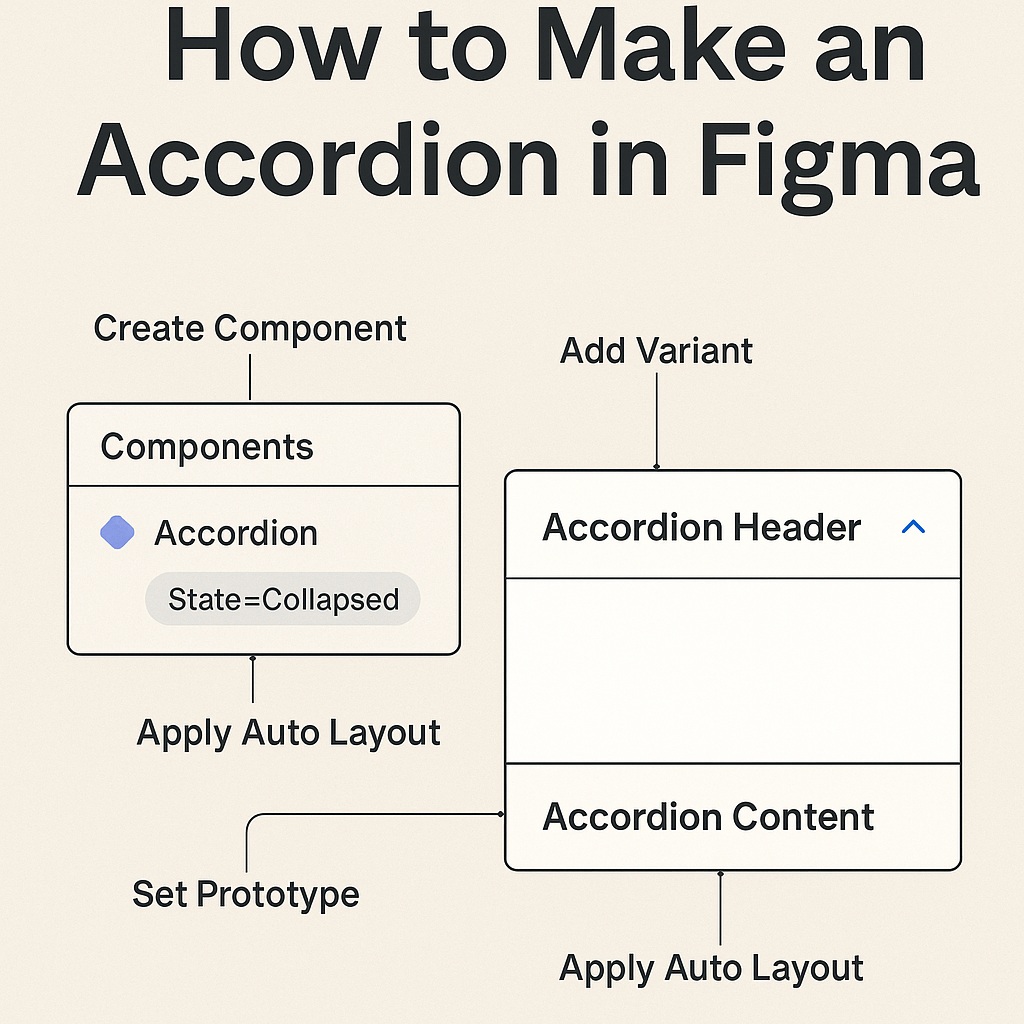
Start by designing the structure of a single accordion section.
- Create a Frame (
F) and set it to use Auto Layout (Vertical). - Inside the frame, add:
- A Header (text or button element).
- A Content Area (a frame with text or components).
- Group the header and content area vertically with spacing.
- Give the content area some padding and maybe a background color.
💡 Tip: Keep the content area separate so you can toggle its visibility.
🔁 Step 2: Turn It Into a Component with Variants
To simulate the open/closed states:
- Select your accordion section and create a Component (
Cmd/Ctrl + Alt + K). - Go to the right-hand sidebar and click “+” to add a Variant.
- In Variant 1 (Collapsed):
- Hide the content area.
- Reduce height accordingly.
- In Variant 2 (Expanded):
- Show the content area.
- Adjust layout as needed.
Rename the variants clearly: e.g., State = Collapsed and State = Expanded.
🔗 Step 3: Add Interactions
- Switch to the Prototype tab.
- Select the Header in the collapsed variant.
- Add an interaction:
- On Click → Change To → Expanded Variant.
- Do the reverse for the expanded variant’s header.
This simulates toggling the accordion open and closed.
🧩 Step 4: Stack Multiple Sections
To make a full accordion list:
- Duplicate the accordion component multiple times in a vertical frame.
- Use Smart Animate in the prototype settings to make transitions smooth.
- Optionally, use nested instances to reuse styles and maintain consistency.
🧪 Optional: Simulate Advanced Behavior
While Figma won’t allow true conditional logic (e.g., “collapse one when another expands”), you can prototype simplified versions or use Interactive Components for more dynamic demos.
✅ Final Thoughts
Creating an accordion in Figma requires some planning, but it’s highly doable with Auto Layout, Variants, and Interactive Prototyping. This method is perfect for presenting UI ideas in client reviews, internal demos, or design handoff sessions—without needing to touch code.

