A gradient fade can add elegance and visual hierarchy to your Figma designs. Whether you’re blending an image into a background or softening UI elements, Figma makes gradient fades simple with a few well-placed tricks.
In this tutorial, you’ll learn how to create a gradient-to-transparent fade effect using built-in Figma tools—no plugins required.
🎨 What Is a Gradient Fade?
A gradient fade transitions an element smoothly from solid color (or image) to transparency or another color. Common use cases:
- Fading text or images into the background
- Creating overlays and banners
- Adding subtle shadows or depth
- Enhancing scroll or hover effects in prototypes
✅ Method 1: Use a Transparent Gradient Fill
This method is ideal for fading a shape or overlay into transparency.
Steps:
- Draw a rectangle over the area you want to fade (e.g., top of an image).
- In the Fill section, click the color swatch.
- Change the Solid Fill to Linear Gradient.
- Set the first color stop to the desired solid color.
- Set the second stop to the same color but with 0% opacity.
- Drag the gradient handles to adjust the fade direction and spread.
✅ Result: A smooth color-to-transparent fade effect.
🖼 Method 2: Create an Image Fade with Masking
To fade an image, you’ll combine a gradient layer with a mask.
Steps:
- Place your image on the canvas.
- Create a gradient fade shape using the method above.
- Group the image and gradient shape.
- Select both → Right-click → Use as Mask.
💡 Tip: You can adjust the gradient afterward for a smoother or sharper fade.
🧠 Pro Tip: Use Radial or Angular Gradients for Unique Fades
- Radial gradients can fade from the center outward.
- Angular gradients are less common, but can create spinning or spotlight-style transitions.
To access them:
→ Fill → Click dropdown next to “Linear” → Choose “Radial” or “Angular”.
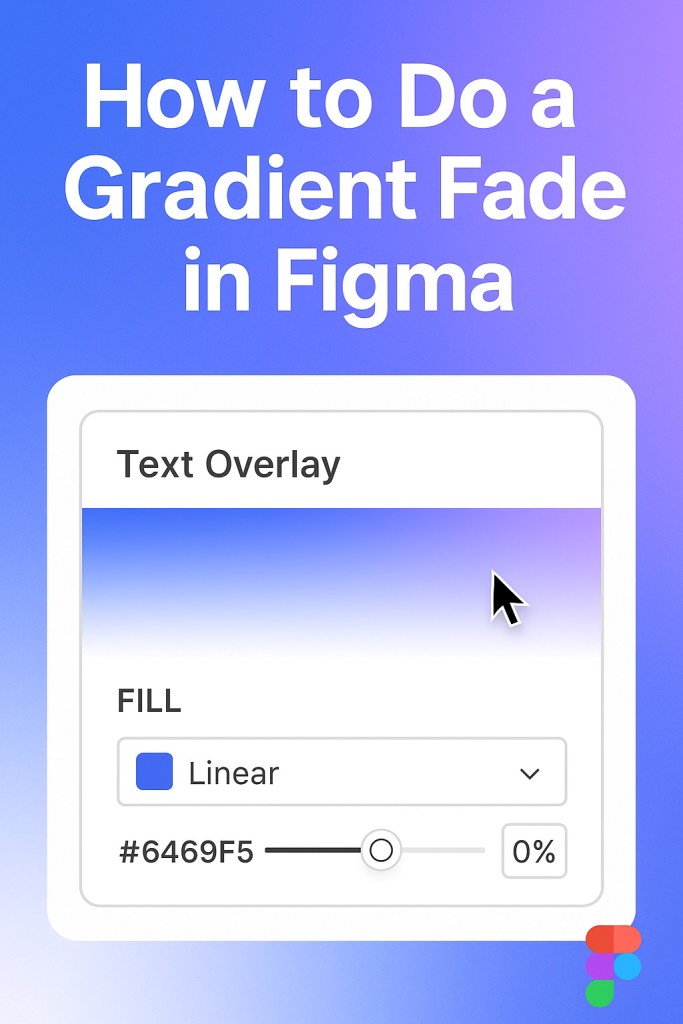
🔥 Use Case: Text Overlays with Fade
Want your text to fade at the bottom of a section?
- Place the text block.
- Add a white-to-transparent rectangle over it.
- Mask it using the rectangle for a fade-out effect.
This adds polish in banners, cards, or hero sections.
⚠️ Common Mistakes to Avoid
| Mistake | Fix |
|---|---|
| Gradient direction reversed | Drag gradient line to fix direction |
| Using black instead of transparency | Set opacity to 0% on second stop |
| Gradient not applying to image | Use masking, not just overlay |
🧪 Bonus: Create Scroll Reveal Effects with Fades
While Figma prototypes don’t support dynamic scrolling fades natively, you can simulate the effect by layering frames and applying gradient fades to top and bottom sections.
✅ Summary: Gradient Fades in Figma
| Technique | Use Case |
|---|---|
| Linear Gradient Fill | Fade solid shapes or overlays |
| Masking with Gradient | Fade images or photos |
| Radial/Angular Gradients | Creative transitions or backgrounds |
Mastering the gradient fade unlocks a wide range of UI polish and visual nuance—no plugins or hacks required.
Want more Figma tutorials like this? Browse advanced prototyping, Dev Mode walkthroughs, and productivity tricks at Designilo.com.

