Branching in Figma is a powerful feature that enables teams to experiment, iterate, and make changes to a design file without affecting the main source of truth. It’s especially useful in collaborative environments where design systems, product UIs, or shared components are being maintained. In this article, you’ll learn exactly how to create a new branch in Figma, when to use it, and what to watch out for.
🧠 What Is Branching in Figma?
Think of a branch as a safe workspace where you can test design ideas, explore different UI approaches, or update components—without changing the original file. It’s similar to version control in coding platforms like Git, but tailored for designers.
🛠️ How to Create a New Branch in Figma
Branching is only available in Figma’s Professional and Enterprise plans. If you’re working in a team with branching enabled, here’s how to create one:
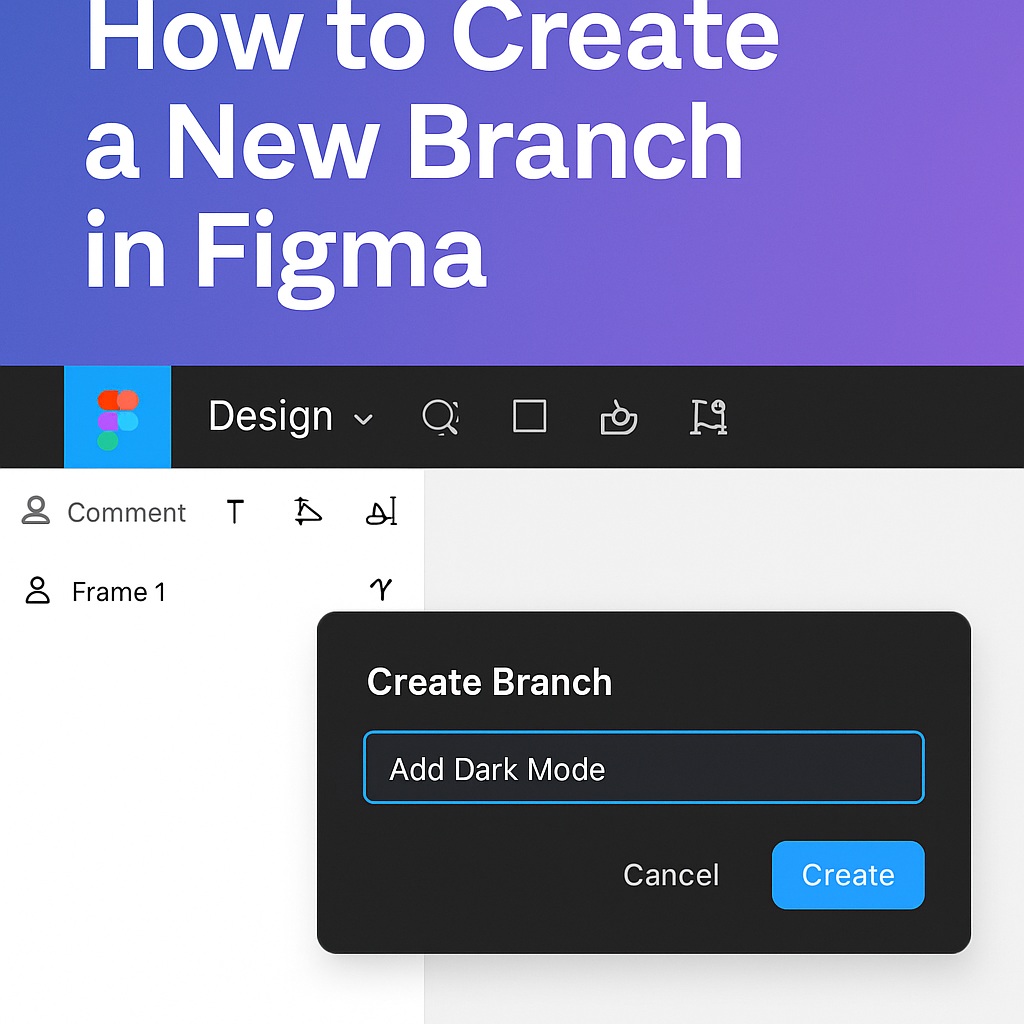
✏️ Step-by-Step Instructions
- Open the File
Navigate to the file you’d like to branch inside your Team or Project. - Click on the Branch Icon
In the top bar of the file, you’ll see an icon that looks like a split or forked path. Click on it, or choose:File→Create Branch. - Name Your Branch
Give your branch a clear, descriptive name like “Update Button Styles” or “Dark Mode Prototype”. - Start Designing
You’ll be taken into a duplicate version of the file, where you can make changes freely. - Commit or Discard Changes
When you’re ready, you can merge the branch back into the main file—or discard it if the experiment didn’t work out.
✅ Best Practices for Using Branches
- One Branch per Task: Keep branches focused. Don’t try to solve unrelated issues in the same branch.
- Clear Naming: Use descriptive names so your teammates know what the branch is for.
- Review Before Merge: Always double-check changes before merging to avoid conflicts.
- Collaborate in the Branch: You can invite others to edit or review the branch before committing it.
🧼 How to Merge a Branch
- Click the Review & Merge button in the top bar of your branch file.
- Review the changes side-by-side with the main file.
- Click Merge Branch to finalize it. Figma will update the main file and close the branch.
🚫 Can’t Find the Branch Option?
Make sure:
- You’re in a Team Project (not a personal draft).
- You’re on a Professional or Enterprise plan.
- You have edit access to the file.
🔄 Why Use Branching in Figma?
- To safely test new layouts or features
- To update design systems without affecting production
- For collaboration and approvals before shipping design updates
🧩 Summary
Creating a branch in Figma is a must-know feature for any design team working on complex projects. It empowers designers to explore ideas, update shared libraries, and streamline team collaboration without the fear of breaking anything. Use it to move fast—and merge with confidence.

