The glitch effect—characterized by distorted visuals, shifting colors, and digital noise—is a popular design aesthetic used in tech, cyberpunk, and gaming interfaces. While Figma isn’t built specifically for motion graphics, it can create a compelling glitch effect using clever layer manipulation and color offsetting. In this article, we’ll walk through the step-by-step process of building a glitch effect in Figma, perfect for text, icons, or UI mockups.
Step 1: Start with Your Base Layer
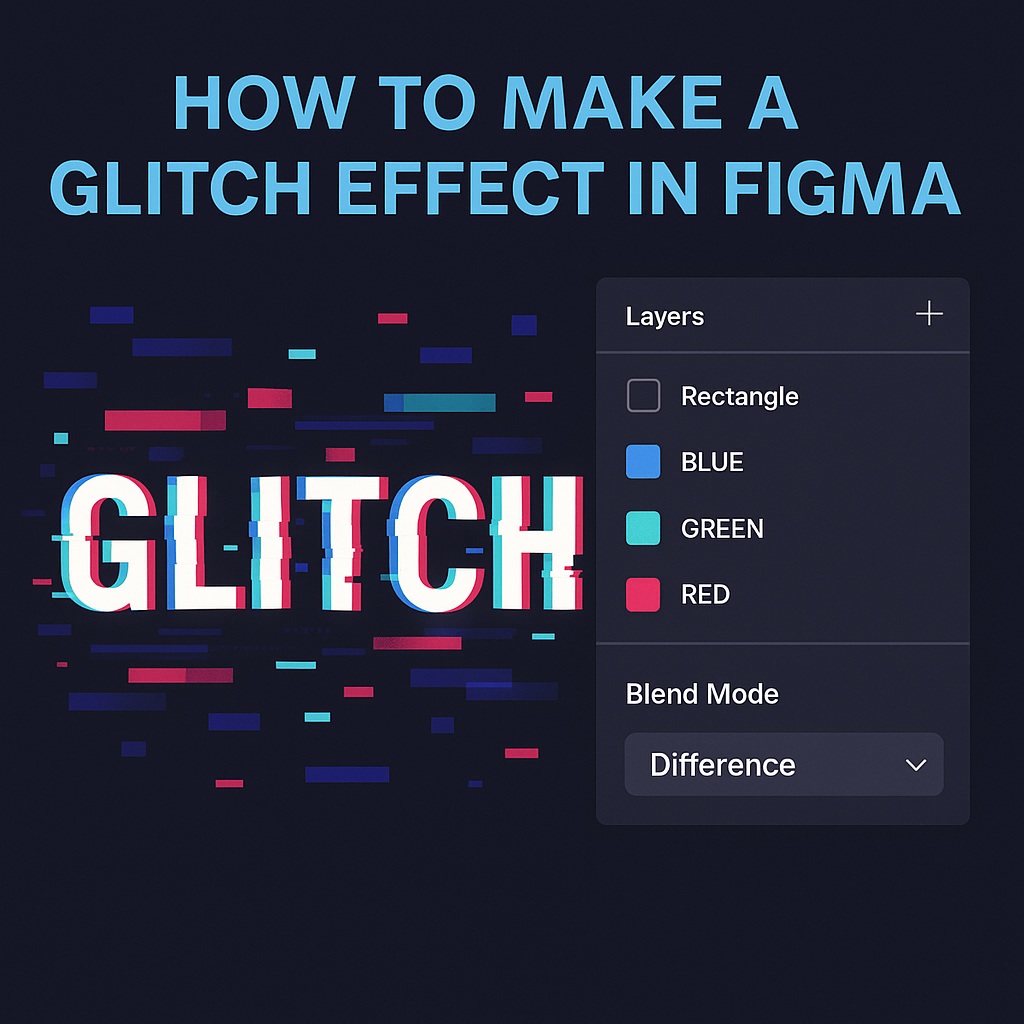
Begin by creating the original object you want to apply the glitch to. This could be a text label like “GLITCH,” an icon, or even an entire button.
- Use a bold font (e.g., Rubik, Anton, or Bebas Neue) for better visual distortion.
- Group elements if necessary to keep your base object intact.
Step 2: Duplicate and Offset
To create the illusion of RGB distortion:
- Duplicate your base object two times (you should now have three layers).
- Color each layer with a different primary color:
- One Red
- One Green
- One Blue
- Slightly offset each layer horizontally or vertically—just a few pixels will do.
- Set each layer’s Blend Mode to Difference, Screen, or Lighten for varied results.
Step 3: Add Displacement Blocks
To simulate glitchy line cuts or digital interference:
- Draw narrow rectangles across the base object.
- Set their color to match the glitch palette (RGB, neon, or white).
- Apply transparency or a blur if needed.
- Randomly scatter the rectangles across the layers—some over text, some under.
This mimics the jagged digital jump cuts seen in glitch animations.
Step 4: Use Boolean Cutouts (Optional)
If you want to take it further:
- Duplicate your base object again.
- Use the Subtract Boolean operation with irregular shapes or rectangles to cut through the layer.
- This creates random voids and breaks in the object—enhancing the glitch effect.
Step 5: Animate the Glitch (Optional)
For simple interactive prototypes:
- Create multiple frames in Figma, each with slightly altered glitch states (e.g., shifting the layers or changing block positions).
- Use Smart Animate in Figma’s prototype mode to simulate flickering.
- Set it to cycle quickly or use After Delay transitions for an auto-glitching animation.
You won’t get full motion graphics capabilities in Figma, but this creates a convincing illusion of digital noise.
Bonus Tip: Use Glitch Plugins
Explore the Figma Community for plugins like:
- “Glitch” – adds random distortions.
- “Color Shift” – good for RGB splitting.
- “Noise & Texture” – to add digital grain for extra realism.
Final Thoughts
Creating a glitch effect in Figma is all about embracing distortion, randomness, and layer play. Whether you’re designing a techy landing page, a cyberpunk poster, or simply adding flair to a UI mockup, this glitch method delivers dynamic visual impact—no After Effects required.
✅ Try it on:
- Hero headings
- Login screens
- Loading animations
- Game menus
- Music or event posters

